I started to bake. I'm not ashamed to say that I was inspired in large part by the
Great British Baking Show. Who doesn't love self-effacing Brits making delicious food?
My first effort was cinnamon bread. I used the
Joy of Cooking recipe for cinnamon raisin bread, minus the raisins. Because I have yet to find any food that raisins actually improve. The recipe uses a milk bread base, and it was a fine first bread.
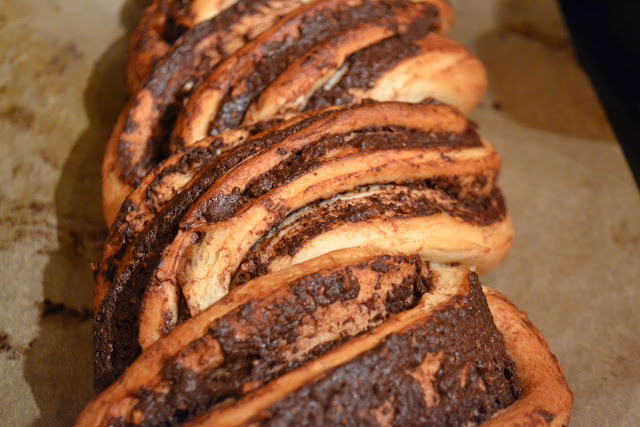
For my second foray into this bready world, I chose this ridiculously wonderful-looking treat: a
Mexican chocolate loaf from the Food Network. I had a dream in my head of something involving chocolate, cinnamon, hazelnuts, and other stuff that I had no idea how to bring into being, so I started with the closest thing I could find to what I wanted.
Here's the final product:
Extremely tasty. Not too shabby looking. Here's how I bumbled through.
Warnings
The time estimates on the recipe are lies for a beginner baker like me. And even for non-beginners, the estimates don't count the dough. I started at 9:30 AM, and finished around 8 pm. It has to rise three times. Oof. I think this hobby will teach me patience.
Also be warned -- the recipe is written backwards. You have to make the thing on the bottom of the instructions first, the "Basic Sweet-Roll Dough." This might be a normal thing for bread recipes that I just don't know about. But I found it silly nonetheless.
The Dough
The recipe is pretty straightforward on the dough front. I don't like nutmeg, so I omitted it. But for the most part, I stuck to what the Food Network Kitchen told me to do.
Yeast
The yeast foaming thing didn't really happen as expected. I thought the whole surface of the saucepan would be freaking out with foamy excitement. Nope. I let the thing go for 20 minutes (the recipe says 5), and all I got was something that looked like the surface of Jupiter with a pool of foam in the middle. I went with it, and it seemed to work out pretty well in the end.
 |
| The Jupiter of Yeast |
 |
| I've always wanted to do this |
Stirring
 |
| Sticky be gone! |
The recipe told me to: "stir with a wooden spoon to make a thick and slightly sticky dough." Overlooking the fact that I don't have a wooden spoon so used a big metal one with those fancy holes in it (gasp!), I did my best, and ended up with a very stick dough that needed more flour.
Kneading
I have a really hard time figuring out how much to knead things. This is potentially an outgrowth of my indecisive, perfectionist nature. But maybe not in full. What the hell does "soft and elastic" mean, exactly?
I found the
Joy of Cooking a sorta useful resource on this front. It teaches you more specifically how to determine whether something is elastic -- basically, stretching the dough and trying to form a spider-web of material. I tried that. It didn't work. I just ended up tearing off bits of dough. So I kneaded more until the necessary spring was there.
 |
| Not cookie dough. Don't eat it. |
Rising
I made my little dough ball, and I put it in my buttered bowl. I took a photo to know for sure when it had doubled in size, covered it in plastic wrap, left it in the kinda-warm kitchen, and hoped it worked.

And it did, after only about an hour.
Joy of Cooking told me to stick my fingers in the dough to test whether it had doubled in size. If your finger prints stay in the dough after you poke it, it means it's ready.
The stuff formed some pretty neat air pockets, too. I promptly squashed them as the recipe ordered me to. Then stuck it in the fridge, where it continued to grow.
The Main Event
Oh boy. I really liked making the filling. It was so beautiful.
 |
| Flour and cocoa powder and sugar, oh my |
I mean
seriously.
Look at this.
 |
| After adding the egg and the butter |
My lack of proper equipment was not just contained to the stirring process. It extended to the rolling process too. A Kleen Kanteen did the job pretty well though.
 |
| Chris's idea. Brilliant. |
The dough also hung a bit over the sides of the cutting board, which made the shape odd in the end. But it did the trick. Also, who really cares if it's misshapen when you have all this beautiful filling to spread and eat.
The cutting part was the only time the lack of proper equipment got to me. I used a porcelain knife to cut through the dough because it's worked well on things of a similar texture in the past. It started out alright. But it got more difficult as I got further into the center of the roll. It required a degree of sawing that I imagine most baked goods professionals would find appalling.
The twisting was much harder than expected. I saw the Brits do this on TV and thought they must just be really bad at it. But no. These things are floppy and wily and not to be trusted.
 |
| Pinched end on the right |
 |
| Mel the Food-Saving Meltotron observes skeptically |
 |
| Home stretch! |
 |
| Kinda sad and gross-looking. Don't let it fool you. |
The Finishing
The recipe called for slathering 4 tbsp butter over the top of the bread. With 10 tbsp already in the dough and the chocolate deliciousness, that just seemed excessive. So I used around 2 tbsp, and it tasted like plenty.
I also reduced the amount of cinnamon sugar on top. I'd roll back the cinnamon sugar even more next time.
In the end, this was more like cake than bread. I might've done something wrong along the way to end up with that result. I have no idea. But I don't really care. It was delicious.
More pictures are
here.


Comments
Post a Comment